|

Vision sensors 
CoppeliaSim offers, next to proximity sensors, another type of sensors: vision sensors. Vision sensors, which are viewable objects, operate in a very similar way as camera objects: they will render the objects that are in their field of view and trigger detection if specified thresholds are over- or under-shot. Vision sensors should be used over proximity sensors mainly when color, light or structure plays a role in the detection process (e.g. infrared sensors, or, more generally, sensors sensible to light (cameras, etc.)). However, depending on the graphic card the application is running on, or on the complexity of the scene objects, vision sensors might be a little bit slower than proximity sensors. Following illustrates applications using vision sensors:
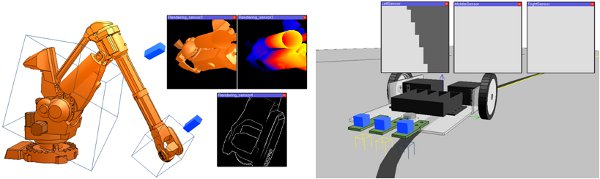
[(1) industrial robot observed by 2 vision sensors, (2) Line tracer vehicle equipped with 3 vision sensors]
Make sure not to mix-up vision sensors with cameras. Following are the main differences:
A vision sensor has a fixed resolution. A camera has no specific resolution (i.e. it adjusts automatically to the view size).
A vision sensor's image content can be accessed via the API, and image processing handles via vision callback functions. A camera's image content is not directly available via the API.
A vision sensor generally requires more CPU time and operates slower than cameras.
A vision sensor can mainly display shapes. A camera can display all object types.
Vision sensors are added to the scene with [Add > Vision sensor].
|