
Realistic video renders using Blender
by federico, 2024-01-10 12:50
In this article we'll see how to create very realistic videos of CoppeliaSim simulations, using the open-source 3D software Blender. This guide is written for Blender 4.0, but it should be easy to follow for different versions.
Integration towards Blender is made possible (and very easy as well) thanks to the glTF format, an open format for efficient transmission and interchange of 3D models and animations, developed by Khronos Group.
Exporting to glTF
Support for the glTF format is provided by the CoppeliaSim GLTF plugin.
This plugin allows to export a model, a scene or a whole simulation to the glTF 2.0 format.
To export a simulation as a glTF animation:
- Load the scene
- Enable the glTF Animation Exporter add-on, from Modules > Exporters
- Start the simulation
- Stop the simulation where the glTF animation should stop: a save dialog will appear to choose where to saver the .gltf file
Note: verify the simulation speed using realtime speed, by enabling it in Simulation > Realtime Simulation, as simulated time will be the only source of time information in the glTF animation, and that becomes ultimately the real time of the rendered animation.
Congratulations! Now a portable 3D animation of the simulation has been saved and can be used in any software supporting the glTF format.
Importing into Blender
To import the animation into Blender, simply start from an empty scene and choose File > Import > glTF 2.0.
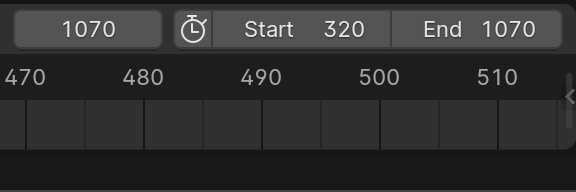
Scroll through the animation frames, and identify where the animation should start and where it should and, and set start and end frame accordingly:
Select the active camera to the desired camera (in case the camera was moving in CoppeliaSim, otherwise, also simply positioning the default camera manually would work):

For a more realistic final result, follow these tips:
-
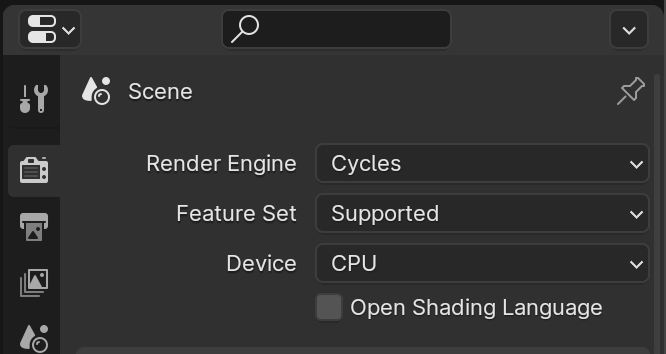
Use the "Cycles" renderer (Render > Render Engine > Cycles).
-
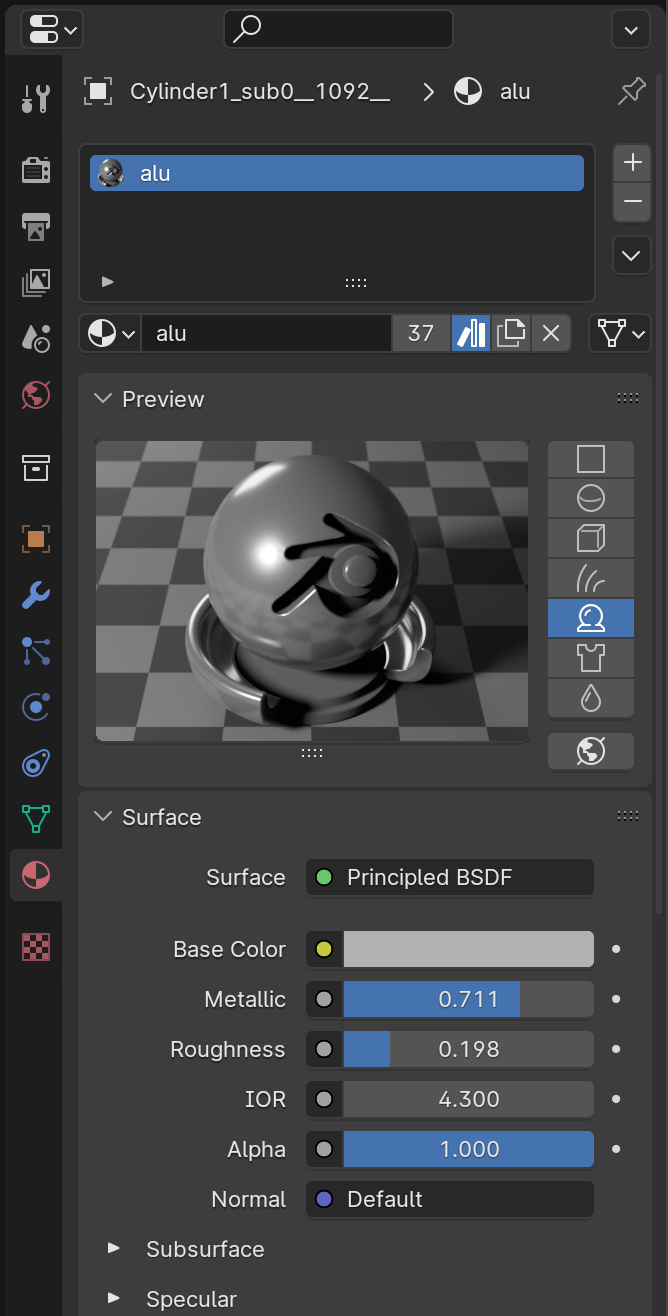
Customize materials: by choosing appropriate values for base color, metallic, roughness, and index of refraction is is possible to simulate the appearance of many real-world materials. Then assign the same material to all shape that have to match.
-
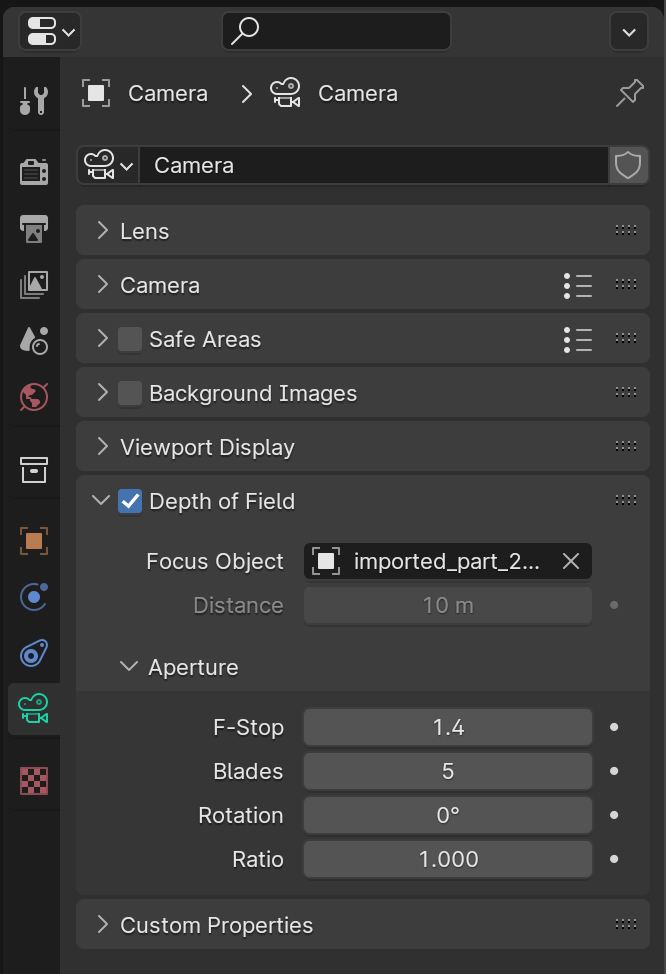
Use depth-of-field: in camera settings, enable Depth of Field, and choose a suitable distance or a specific object to focus.
-
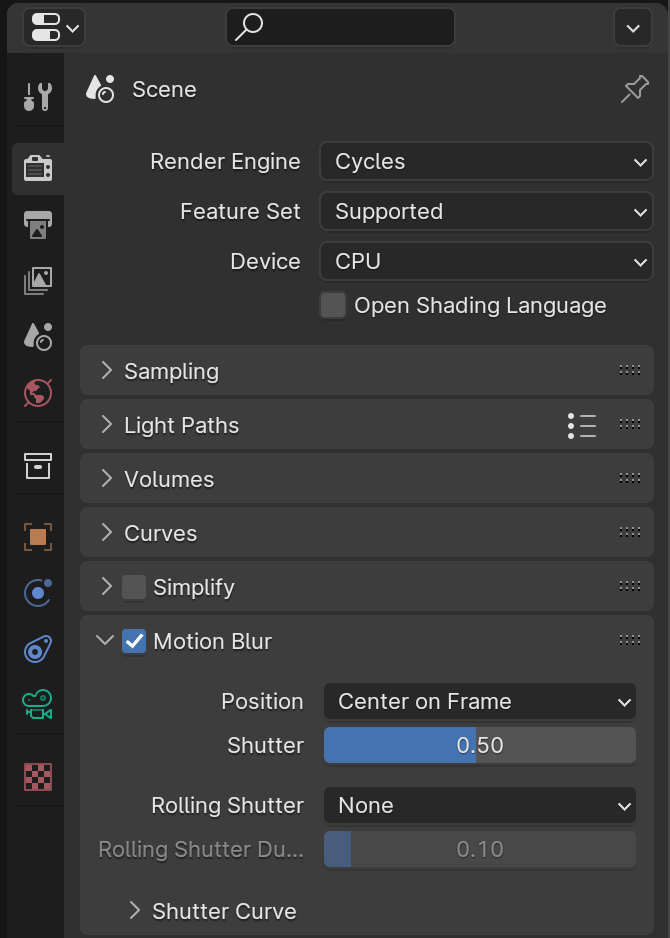
Use motion blur: enable Render > Motion blur.
-
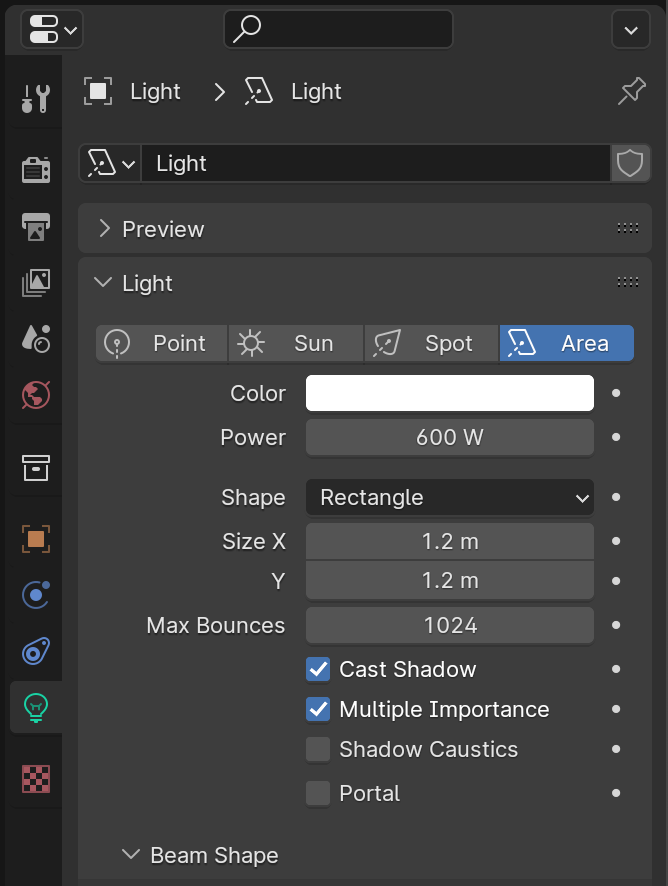
Use area light instead of point light: this produces more realistic lighting and reflections, and softer shadows.
When everything is set up, check with Render > Render Image if everything is ok. Then select start and end frame and render the whole animation, via Render > Render Animation
Animation is saved as individual images. Can be turned into a compressed video with ffmpeg, e.g.:
ffmpeg -framerate 30 -start_number 8230 -i %04d.png -c:v libx264 -profile:v high -crf 19 -pix_fmt yuv420p output.mp4(in above command, we choose a framerate of 40 frames per second, and starting from 8230.png, using a compression factor of 23. See the ffmpeg manual for more details.
An example of the final result: